Budget-Friendly DIY Kitchen Decorating Ideas
Revamping your kitchen doesn’t have to break the bank. With a little creativity and some DIY spirit, you can transform your space into a stylish and inviting haven. This guide provides budget-friendly DIY kitchen decor ideas that are easy to implement and will breathe new life into your kitchen. Whether you’re looking to add a rustic touch, create more storage, or simply refresh the look of your space, these projects offer something for everyone. The key is to embrace the DIY ethos and enjoy the process of creating something beautiful and functional with your own hands, all while keeping your expenses in check. Let’s dive into some amazing ideas to elevate your kitchen décor without overspending.
Repurposed Items
One of the best ways to decorate your kitchen on a budget is to repurpose items you already have. This not only saves money but also adds a unique, eco-friendly touch to your décor. Old jars, wooden pallets, and other discarded items can be transformed into stunning kitchen accents with a little imagination. Repurposing minimizes waste and gives you a chance to showcase your creativity. With a little effort, you can turn forgotten items into practical and beautiful additions to your kitchen, providing both functionality and visual appeal. Consider what you already own and see how you can give them new life.
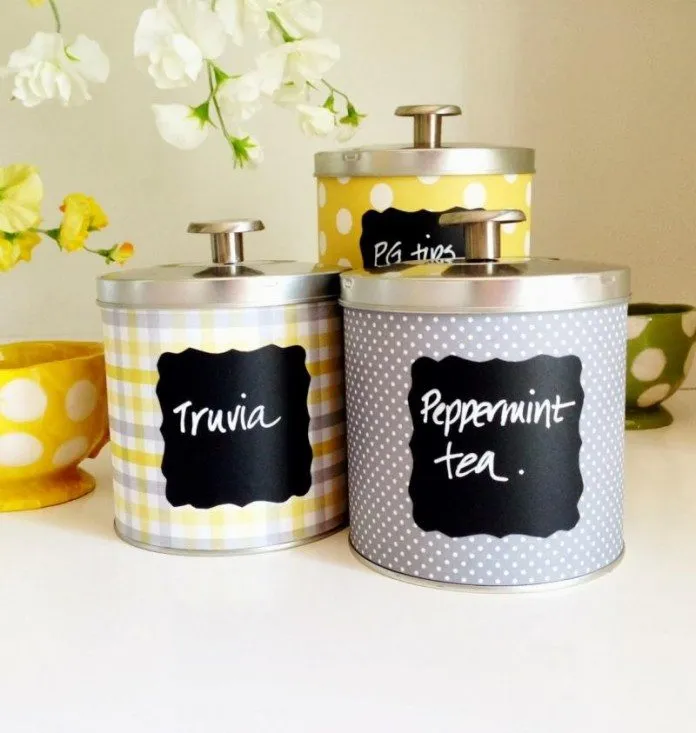
Transforming Old Jars

Old glass jars can be transformed into various kitchen décor pieces. Clean and decorate them with paint, twine, or fabric to create unique storage containers for utensils, dry goods, or even small plants. Paint the jars with chalk paint and label them for a farmhouse-chic look. Wrapping twine around the jars can add a rustic touch that complements any kitchen style. Get creative with textures and colors to match your kitchen’s aesthetic, turning what was once trash into a beautiful and practical kitchen accent. These personalized storage solutions are both cost-effective and add a unique touch to your kitchen.
Using Wooden Pallets
Wooden pallets are a versatile and inexpensive material for DIY kitchen decor. They can be repurposed into a variety of items, such as rustic shelves, coffee stations, or even a unique kitchen island. Disassemble the pallet and sand the wood to remove splinters and create a smooth surface. You can stain, paint, or simply leave the wood natural to match your kitchen’s style. Building shelves from pallets provides extra storage space, and can be easily customized to fit your kitchen’s dimensions. Using pallets adds a rustic, upcycled look to your kitchen, while showcasing your commitment to sustainable design.
Creating a Gallery Wall
A gallery wall can instantly elevate the look of your kitchen, making it feel more personalized and stylish. This DIY project allows you to showcase artwork, photos, or even kitchen-themed prints. The gallery wall is a fantastic way to add color, personality, and charm to your kitchen. The key to a successful gallery wall is thoughtful planning and execution. The arrangement should be visually appealing, telling a cohesive story that reflects your personal style. Choose a theme, such as food-related art or family photos, to create a unified look that ties the space together and complements the overall design of your kitchen.
Choosing the Right Frames

When creating a gallery wall, the frames are just as important as the art itself. Choosing the right frames can dramatically impact the overall look and feel of the gallery. Consider the style of your kitchen and choose frames that complement it. For a modern kitchen, opt for sleek, minimalist frames, while a farmhouse kitchen might suit rustic, distressed frames. Don’t be afraid to mix and match frame styles to add visual interest, but keep the overall look cohesive by using a consistent color palette or material. Look for affordable options like thrift store finds or inexpensive frames from craft stores, which you can easily customize with paint or other embellishments.
Arranging Your Gallery Wall
Arranging your gallery wall is where the fun begins. Before you start hanging anything, lay out your frames on the floor to plan your arrangement. This allows you to experiment with different layouts and ensure everything fits together visually. Consider using painter’s tape to mark the wall where each frame will hang, making it easier to visualize the final result. There are many ways to arrange a gallery wall, from symmetrical grids to more organic, asymmetrical layouts. Consider using a template or guide to help with spacing and alignment. The goal is to create a visually appealing and harmonious display that complements your kitchen décor and reflects your personal style.
DIY Kitchen Organization Hacks
A well-organized kitchen is essential for efficient cooking and a clutter-free environment. DIY kitchen organization hacks can help you maximize space and keep your kitchen tidy without spending a fortune. From creating custom storage solutions to repurposing everyday items, these hacks will help you streamline your kitchen and make it more functional. Organize your pantry, optimize your drawers, and create storage space where you thought none existed. These projects are not only practical but can also add a touch of personality to your kitchen. By implementing these DIY organization tips, you can create a kitchen that’s both efficient and aesthetically pleasing, making your cooking and meal preparation a more enjoyable experience.
DIY Floating Shelves

Floating shelves are a stylish and space-saving storage solution that can elevate the look of any kitchen. They provide additional storage for dishes, cookbooks, or decorative items. This DIY project can be customized to fit your kitchen’s dimensions and style. Floating shelves create the illusion of more space by removing bulky cabinets. This is a straightforward DIY project, suitable for all skill levels, that can be easily adapted to match your kitchen’s décor. With a bit of effort and the right materials, you can create elegant and functional shelves that add a touch of modern flair to your kitchen while maximizing vertical storage space.
Measuring and Cutting
Accurate measuring and cutting are critical steps for installing floating shelves. Before you start, measure the desired length and width of your shelves, ensuring they fit the space you have available. Use a level to mark where you want the shelves to be installed, and make sure to account for any obstacles, such as windows or outlets. Cut the wood to the precise measurements using a saw. For a clean finish, sand the edges of the cut wood to remove any splinters or rough spots. Taking your time and double-checking your measurements will ensure your shelves fit perfectly and look professional when installed.
Installing the Shelves
Proper installation is crucial for ensuring your floating shelves are secure and can support the weight of your items. There are several methods for installing floating shelves. Using hidden brackets is a popular option for a clean, minimalist look. First, attach the brackets to the wall, ensuring they are level and securely anchored to the studs. Slide the shelves onto the brackets, and secure them with screws. Always double-check that your shelves are level after installation. With careful installation, your floating shelves will become a stylish and functional addition to your kitchen, offering both beauty and practicality.
Spice Rack Makeover

An organized spice rack is essential for any kitchen. A spice rack makeover not only enhances the aesthetics of your kitchen but also makes it easier to find and use your spices. You can customize a spice rack to fit your kitchen’s style and layout. There are several DIY options, from building a custom rack to repurposing existing storage. A well-organized spice rack will also help prevent spills and messes, creating a more efficient and enjoyable cooking experience. Spice rack makeovers are an easy way to add a practical and attractive element to your kitchen.
Organizing Your Spices
Organizing your spices is essential for an efficient and visually appealing spice rack. Start by discarding any expired spices and consolidating duplicates. Group your spices by type or how you use them in your cooking. Consider using matching containers to create a cohesive look. Label each container clearly with the spice name, and you can also add the expiration date. Proper organization not only makes cooking easier but also allows you to easily keep track of your spice inventory. This organization system keeps your spices fresh and accessible, enhancing the functionality of your kitchen.
Adding Labels
Adding clear and attractive labels is a final step in organizing your spice rack. Labels should be easy to read and match the style of your kitchen. You can create your own labels using a label maker, or print custom labels from a computer. Consider using waterproof labels to protect them from spills or splashes. Labels not only help you identify your spices quickly but also add a touch of personality to your spice rack. The added organization makes your cooking more efficient and creates a visually appealing and organized kitchen space.
DIY Kitchen Decorating with Fabric

Fabric can be a versatile and cost-effective material for adding personality and style to your kitchen decor. Whether you’re looking to create custom curtains or elegant table linens, working with fabric is a simple and rewarding DIY project. From choosing the right fabric to mastering basic sewing techniques, this guide provides you with all the information you need to transform your kitchen. You can easily inject color, texture, and pattern to personalize your space. Fabric projects offer a range of possibilities, from enhancing the aesthetic appeal of your kitchen to improving its functionality.
Making Curtains
Custom curtains can add a touch of elegance and style to your kitchen. Choose fabrics that complement your kitchen’s color scheme and style. Curtains can provide privacy, filter sunlight, and add a decorative element to your windows. Making your own curtains allows you to customize the size, fabric, and style to perfectly suit your kitchen. Sewing your own curtains is a practical and affordable DIY project that allows you to transform your kitchen with a personalized touch. With a little effort and the right fabric, you can create beautiful curtains that enhance the look and functionality of your kitchen.
Choosing the Fabric
Selecting the right fabric for your curtains is crucial for both style and functionality. Consider the amount of natural light your kitchen receives and choose a fabric that complements this. For a brighter kitchen, choose lightweight, sheer fabrics that allow light to filter through. For privacy, choose heavier, opaque fabrics. Consider the style of your kitchen and select fabrics that match. If your kitchen is farmhouse-style, choose fabrics with patterns like stripes or gingham. Measure your windows carefully to determine how much fabric you will need, ensuring you have enough to accommodate the desired length and width of your curtains.
Measuring and Cutting

Accurate measuring and cutting are essential for making professional-looking curtains. Measure the height and width of your windows. Add extra length for the hem at the top and bottom. Cut the fabric using a rotary cutter and cutting mat, or use sharp scissors. Ensure the fabric is straight and square before you start cutting. Take your time, and double-check your measurements to avoid any mistakes. Accurate cutting ensures the finished curtains will fit your windows perfectly. Precise measurements will result in well-fitting curtains that enhance the look of your kitchen.
Creating Table Linens
Table linens, such as tablecloths and napkins, can instantly transform your kitchen and add a touch of elegance to your dining area. DIY table linens are a cost-effective way to create custom pieces that match your kitchen’s décor. Sewing your own tablecloths and napkins allows you to select fabrics that complement your kitchen’s style and color scheme. With a few basic sewing skills, you can create beautiful, personalized table linens that enhance the dining experience. The right table linens can make your kitchen more inviting, while adding a touch of style.
Selecting Fabrics
When choosing fabric for table linens, consider the look and feel you want to achieve. For everyday use, select durable, easy-to-care-for fabrics, such as cotton or linen blends. For special occasions, consider silk or satin for a more luxurious touch. Choose fabrics that complement your kitchen’s existing décor. Consider patterns or solid colors depending on the style you prefer. Ensure the fabric is washable and easy to iron to maintain a clean and stylish appearance. The right fabric will ensure your table linens are both functional and attractive, adding a touch of elegance to your dining area.
Sewing the Linens
Sewing your own table linens is a rewarding DIY project that enhances your sewing skills. Start by measuring and cutting the fabric to the desired size. Use a sewing machine or hand-stitch the edges, creating a neat hem. Add decorative stitches or embellishments to customize your table linens further. The finished product will add a touch of elegance to your kitchen and dining area. Sewing your table linens gives you a sense of accomplishment, transforming your dining experience with personalized, handmade pieces.
In conclusion, DIY kitchen decor offers an exciting avenue to transform your space while staying within your budget. From repurposing items to crafting personalized storage solutions and fabric projects, the possibilities are endless. Each project offers an opportunity to express creativity and add a unique touch to your kitchen. By embracing the DIY approach, you not only save money but also enhance your kitchen’s functionality. Start with one or two projects and watch as your kitchen becomes more stylish and reflective of your personal taste. Your kitchen will become a space you love to spend time in, one DIY project at a time.